
Sokoban Master is easier to learn when every attempt has one purpose. Open Sokoban Master while reading, test one section at a time, and keep the choices that make Sokoban Master more consistent. This guide focuses on observable controls and systems rather than unsupported shortcuts.
The game identity, instructions, thumbnail, and publisher iframe come from the GameMonetize newest HTML5 publisher feed, which lists Sokoban Master for distribution to game portals.
Read the Entire Board
Map Crates and Targets
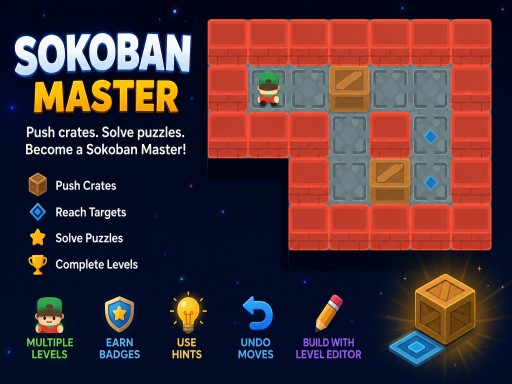
Sokoban Master should begin with observation rather than a push. Count the crates, match that count with the targets, and note walls, corridors, open rooms, and corners. A target in Sokoban Master is not reachable merely because it is close; the player must also reach the square behind the crate for the final push. Trace that approach before moving anything. If two crates appear suitable for one target, Sokoban Master should prefer the assignment that preserves more access for the other crate. This board map turns Sokoban Master from trial and error into a sequence of physical constraints.
Mark Dangerous Squares
Corners without targets are permanent dead squares in Sokoban Master because a crate pushed there cannot be pulled out. Wall strips can be equally dangerous when no target lies along the strip and no side access remains. Before the first push, Sokoban Master should identify these spaces mentally and treat them as blocked for crates. The player may still walk through open dangerous squares, but every push toward them needs a reason. As Sokoban Master boards become tighter, also watch for two crates that could freeze each other. Avoiding one deadlock saves more moves than solving several later steps efficiently.
Plan from the Targets
Find the Final Push
Choose a target in Sokoban Master and imagine the crate already placed there. Which adjacent square held the crate before the final push, and where did the player stand? Work backward one or two pushes until the route connects with open space. Sokoban Master often reveals the correct crate order through this question because one target may lose its approach after another is filled. If a target sits at the end of a corridor, Sokoban Master should usually solve the deepest requirement first. Backward planning protects the access square and gives Sokoban Master a destination-led solution rather than a sequence of attractive but unrelated pushes.
Preserve Player Access
A crate can be perfectly aligned in Sokoban Master and still be useless if the player cannot reach the pushing side. Every planned push should include the player's route after the crate moves. Sokoban Master needs loops and open passages until their final purpose is complete, so avoid sealing a corridor simply because a crate can enter it. When two crates share a narrow area, move the one that restores access before the one that consumes it. Sokoban Master becomes much easier when the player treats walking space as a resource. Protecting access is often more important than moving a crate closer to its target.
Control Crate Order
Solve Tight Targets First
Targets near walls or corridor ends usually have fewer valid entry directions in Sokoban Master. Assign crates to those constrained targets before using the flexible center squares. If Sokoban Master fills an easy central target too early, that crate may become a wall that blocks the difficult route. Test the constrained sequence with slow pushes and use undo if the approach square disappears. Once the tight target is secure, Sokoban Master can use the remaining open room for rearrangement. This order reduces branching choices and keeps later crates from competing for the same narrow path.
Use Temporary Parking
Not every Sokoban Master push should move a crate directly toward its final target. Sometimes a crate must wait in an open square while another passes, but temporary parking must preserve access on enough sides. Choose a central location that does not block a corridor, target, or turning square. Sokoban Master should know how the parked crate will leave before putting it there. If the exit requires the player to stand against a wall, choose another square. Purposeful parking gives Sokoban Master room to change crate order without creating a hidden deadlock, and it makes crowded boards easier to sequence.
Use Undo and Restart
Undo the First Bad Push
Z is most useful in Sokoban Master immediately after the plan breaks. Undo the push that removed access, entered a dead square, or changed the intended crate order. Continuing several moves after the error makes the useful board state harder to remember. Sokoban Master should distinguish walking mistakes from structural mistakes: an unnecessary walk may affect the move count, but a bad push can destroy the solution. During the first clear, prioritize a solvable state. During a later star attempt, Sokoban Master can undo inefficient walking as well. This keeps analysis focused on the purpose of each move.
Restart with a Hypothesis
A full Sokoban Master restart is valuable when the opening crate assignment was wrong or the board has reached an unrecoverable deadlock. Before restarting, state what the new opening will change. Sokoban Master might send a different crate to the corridor target, leave the center open longer, or approach one wall from the opposite side. Repeat the stable parts and test only that hypothesis. A restart without a theory merely repeats uncertainty. A restart with a specific change lets Sokoban Master compare two plans and preserve the one that keeps more options available.
Improve Stars and Move Count
Clear Safely Before Optimizing
The first Sokoban Master solution establishes that the crate order works. Do not sacrifice that proof while chasing a low move count. Complete the board, then replay it and identify detours, repeated corridor crossings, and temporary pushes that may be removed. Sokoban Master can optimize walking separately from crate movement because pushes usually carry more structural risk. Keep the solved crate assignment and shorten the player's route around it. When Sokoban Master improves one section, compare the move counter at the same board state. This produces measurable efficiency without replacing a valid solution with an untested shortcut.
Plan Walking Routes
Efficient Sokoban Master play includes the steps between pushes. Before walking around a crate, check whether the next two pushes require the same side or an opposite side. Sokoban Master may save a long loop by ordering two nearby actions differently. In an open room, position the player for the next push before moving the current crate into place. Do not reduce steps by taking a risky push that limits later access. Sokoban Master star runs remain dependable when optimization removes redundant walking while preserving the known-safe crate sequence and all necessary approach squares.
Learn Through the Level Editor
Build a Solvable Core
The Sokoban Master level editor is useful for understanding why puzzles work. Start with one crate, one target, and enough space to push from several directions. Then add a wall that removes one approach and test the board from the beginning. Sokoban Master design should always preserve at least one full solution, so solve every revision rather than assuming it works. Adding more crates before the core interaction is proven can hide an accidental deadlock. A small tested layout teaches Sokoban Master concepts more clearly than a large board with no intentional sequence.
Create Fair Difficulty
A fair Sokoban Master puzzle signals its constraints through visible walls, targets, and access lanes. Difficulty should come from crate order and route planning, not from an impossible opening. Use the editor to create one meaningful decision, such as choosing which crate enters a corridor first, then place enough open space for the player to understand the consequence. Solve Sokoban Master with the intended route and search for unintended shortcuts. If a crate can be trapped before the key idea is visible, adjust the board. Designing and testing levels helps Sokoban Master players recognize deadlocks and final-push geometry in normal stages.
Decision Review
Check One Decision at a Time
- Sokoban Master checks Map Crates and Targets; Sokoban Master records the result; Sokoban Master keeps the better choice.
- Sokoban Master checks evidence after map crates and targets; Sokoban Master records the result; Sokoban Master keeps the better choice.
- Sokoban Master checks Mark Dangerous Squares; Sokoban Master records the result; Sokoban Master keeps the better choice.
- Sokoban Master checks evidence after mark dangerous squares; Sokoban Master records the result; Sokoban Master keeps the better choice.
- Sokoban Master checks Find the Final Push; Sokoban Master records the result; Sokoban Master keeps the better choice.
- Sokoban Master checks evidence after find the final push; Sokoban Master records the result; Sokoban Master keeps the better choice.
- Sokoban Master checks Preserve Player Access; Sokoban Master records the result; Sokoban Master keeps the better choice.
- Sokoban Master checks evidence after preserve player access; Sokoban Master records the result; Sokoban Master keeps the better choice.
- Sokoban Master checks Solve Tight Targets First; Sokoban Master records the result; Sokoban Master keeps the better choice.
- Sokoban Master checks evidence after solve tight targets first; Sokoban Master records the result; Sokoban Master keeps the better choice.
- Sokoban Master checks Use Temporary Parking; Sokoban Master records the result; Sokoban Master keeps the better choice.
- Sokoban Master checks evidence after use temporary parking; Sokoban Master records the result; Sokoban Master keeps the better choice.
- Sokoban Master checks Undo the First Bad Push; Sokoban Master records the result; Sokoban Master keeps the better choice.
- Sokoban Master checks evidence after undo the first bad push; Sokoban Master records the result; Sokoban Master keeps the better choice.
- Sokoban Master checks Restart with a Hypothesis; Sokoban Master records the result; Sokoban Master keeps the better choice.
- Sokoban Master checks evidence after restart with a hypothesis; Sokoban Master records the result; Sokoban Master keeps the better choice.
- Sokoban Master checks Clear Safely Before Optimizing; Sokoban Master records the result; Sokoban Master keeps the better choice.
- Sokoban Master checks evidence after clear safely before optimizing; Sokoban Master records the result; Sokoban Master keeps the better choice.
- Sokoban Master checks Plan Walking Routes; Sokoban Master records the result; Sokoban Master keeps the better choice.
- Sokoban Master checks evidence after plan walking routes; Sokoban Master records the result; Sokoban Master keeps the better choice.
- Sokoban Master checks Build a Solvable Core; Sokoban Master records the result; Sokoban Master keeps the better choice.
- Sokoban Master checks evidence after build a solvable core; Sokoban Master records the result; Sokoban Master keeps the better choice.
- Sokoban Master checks Create Fair Difficulty; Sokoban Master records the result; Sokoban Master keeps the better choice.
- Sokoban Master checks evidence after create fair difficulty; Sokoban Master records the result; Sokoban Master keeps the better choice.
Next Session Checklist
Make One Measurable Change
Start Sokoban Master with one observation goal, preserve the parts of the route or system that already work, and change only the decision connected to the first failure or slowdown. After the attempt, compare the result before adding another adjustment. This method gives Sokoban Master a dependable learning loop and keeps a short browser session useful. Return to Sokoban Master when the next goal is clear, then let Sokoban Master provide the evidence for the following change.